Your First Record
This guide will help you quickly create your first transaction.
Open the Recording Page
Tap the "+" button at the bottom center to open the recording page.
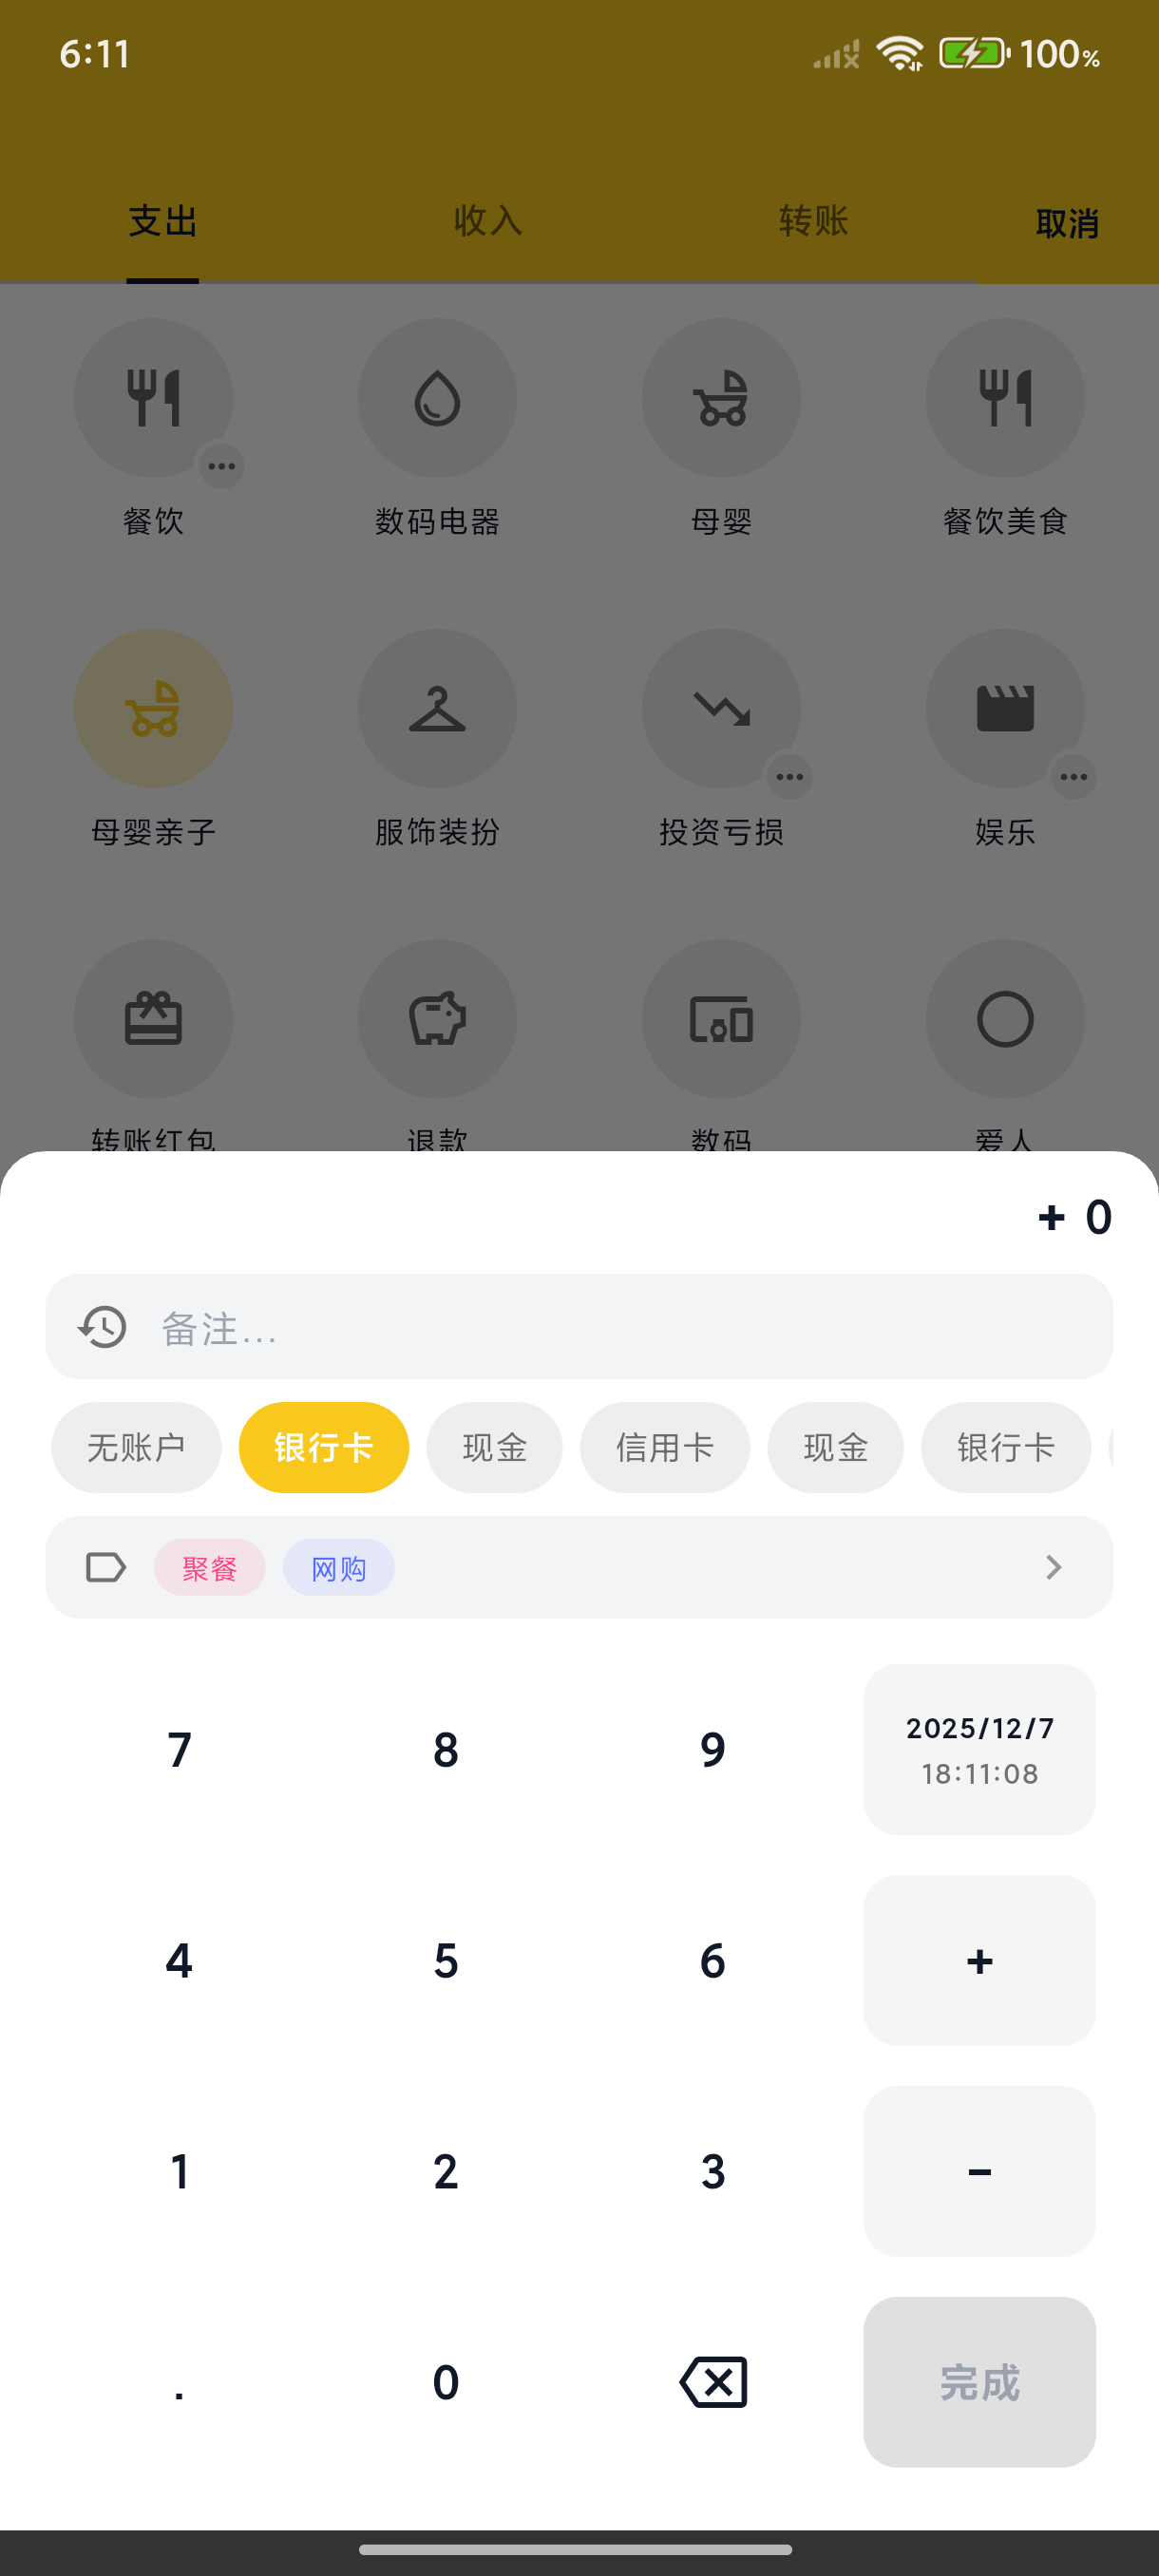
Record an Expense
- Select Type - Default is "Expense", you can also switch to "Income" or "Transfer"
- Enter Amount - Use the number pad to enter the amount
- Select Category - Tap a category icon to choose the expense category
- Select Account - Choose the account for the expense (e.g., Cash, Bank Card)
- Add Note (Optional) - Tap the note field to add a description
- Save - Tap the "Done" button in the top right to save
Quick Actions
Change Date & Time
Tap the date/time area to modify when the transaction occurred - useful for backdating past expenses.
Add Tags
Tap "Add Tag" to label this transaction for easier filtering and statistics later.
Add Image
Tap the camera icon to take a photo or select from your gallery - great for saving receipts.
View Records
Return to the home page to see your newly recorded transaction, organized by date.
- Tap a record to edit it
- Swipe left on a record to delete it
Next Steps
Now that you've learned the basics of recording, explore more features:
- Category Management - Customize your categories
- Account Management - Manage multiple accounts
- Statistics & Analysis - View income & expense reports